
My focus for this visual how-to will be on managing process and technique in a detailed drawing.
TIP: Mask off the border if you have a tendency to be messy.
Prep your canvas (paper) however you like—I typically mask off the border because I have a habit of not paying attention to where the heel of my hand is resting when I work and often wind up smudging graphite. If you prefer a more “free” edge, then don’t mask it off.
TIP: Have a number of clean pieces of paper nearby that you can rest your hand on while drawing*—Tape or hold paper scraps over completed areas of work to prevent smudging.
*Once you get oils from your hand on the paper, you will never get it out—Which is why I don’t recommend blending with your fingers. Oils can ruin how the paper accepts graphite.
Once you get your work space set up, select a pencil and start sketching the base framework of the subject—block in shapes with broad color strokes or by outlining shapes with light line.


For this drawing, I chose to block in the basic shapes and features using line due to the degree of detail I was planning.
TIP: Start by blocking in shapes—fur clumps, fur patterns, specific features such as the eyes, ears, nose, or mouth, or negative space.
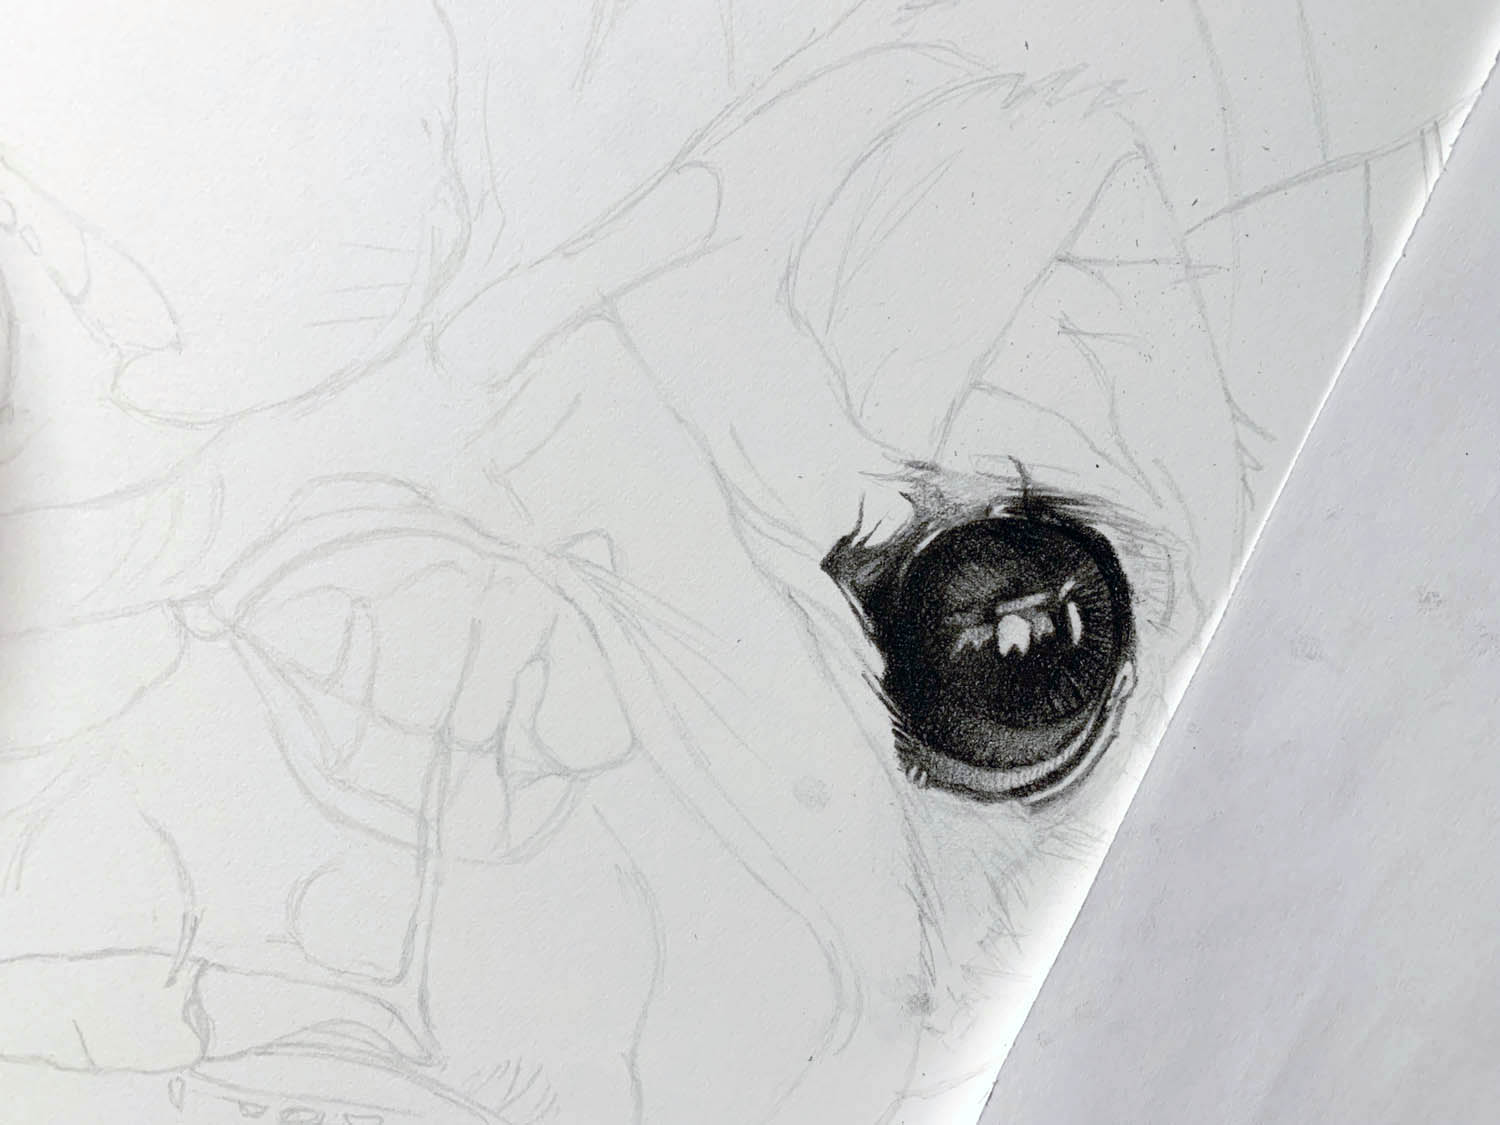


TIP: Create darks by layering progressively softer leads.
As you’ll note in the progression above, I always start with the dark areas then move to the light areas. I block in the darks with a very light pencil to establish the shape first, then meticulously layer progressively softer leads to fill in the deepest darks. This process typically begins with a 2H or H pencil, then I’ll move to an HB or 2B, and finish with a 4B or 6B lead. I work with standard pencils, mechanical pencils, or lead holders as I see fit.
Why build up dark areas layer by layer instead of going straight to a 6B lead to fill in the darks? Simple. Hot press watercolor paper still has tooth (texture) and if you go in straight away with a 6b lead you’ll find that it has a hard time working into the paper’s tooth without exerting a tremendous amount of pressure. What happens then is that you will get an inconsistent fill of color. If you layer your darks, the depth of the darks will be uniform and rich—basically, use the exact same layering technique you would use when painting with oils or watercolor.
TIP: If your goal is realistic detail, harder leads are your best friend. While 6B leads will give you the ability to create rich darks, they are far too soft to draw sharp detail without constantly sharpening—Layering from hard leads to soft leads gives you the ability to combine precise detail with rich darks. Of course, your paper choice will ultimately determine the degree of detail you will be able to achieve.
Why not use bristol board? I find that watercolor paper can take an enormous amount of abuse without losing the ability to hold graphite. Bristol board has a tendency to “dent”.
You would never know it by looking at this drawing, but I adjusted Jazzy’s eyes five times completely erasing deep blacks. For those of you who noticed how her eyes are a bit wonky … Yes, her left eye wandered just enough to make you wonder if she was looking at you or at a hotdog hovering just over your right shoulder.


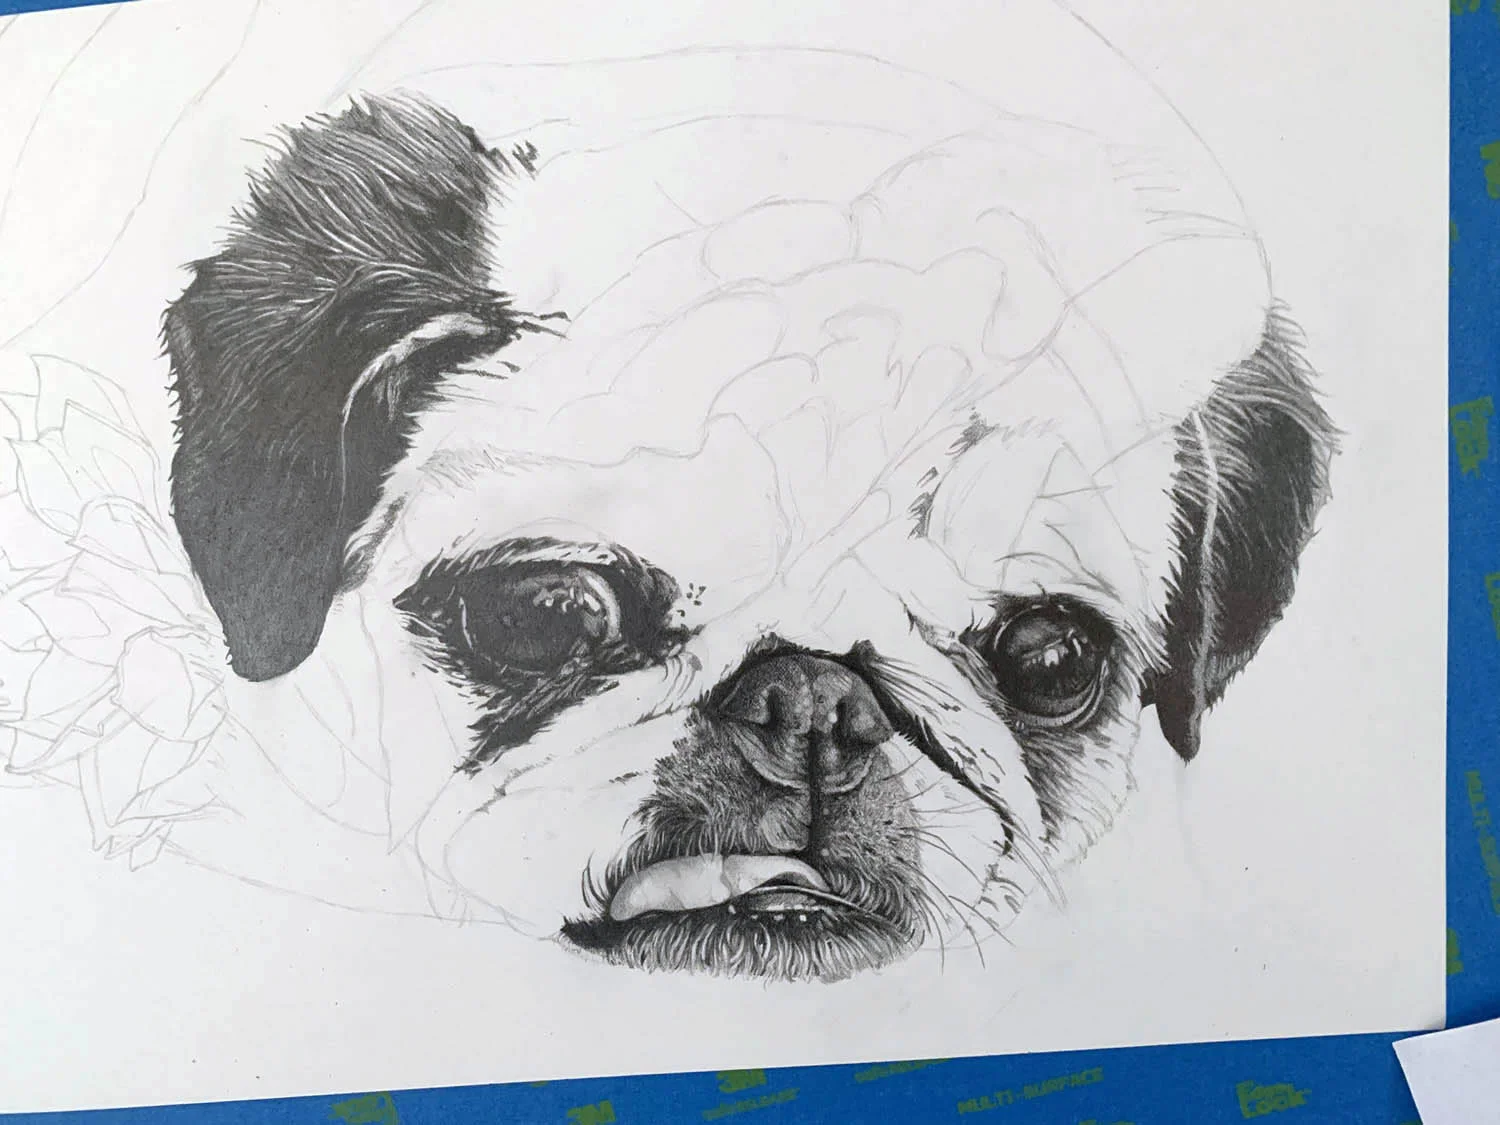


TIP: Move around the drawing section-by-section rather than filling large areas with tone and line work. Think about completing 1 inch by 1 inch at a time to prevent getting overwhelmed.
I draw hair patch by patch, rather than working the entire drawing. This approach helps keep the work manageable. The photos I was using for reference had very little detail and I had to use reference photos of other pugs to get a feel for how a pug’s hair flows around their facial folds and body. What makes pug hair difficult to draw is that they have predominantly short hair that is very very dense. This density leaves precious little “dark” space between their hairs.
Why is this a challenge? Realistic hair isn’t drawn hair by hair—one line, one hair. Rather, draw the negative space around and in-between the hair, then pick out individual strands as you see fit to add detail—working from the darkest spaces to the lightest spaces between the hairs. Use a kneadable eraser to pull lights back into darks to blend areas of adjacent dark and light hair. Note that nearly all of the whites in the drawing are blank paper and have not been erased back to the paper.


The progression above shows the point at which I shifted how I was drawing Jazzy’s hair—this drives the perfectionist in me crazy, but it was a necessary decision in order to meet my self-imposed deadline, a birthday. I simply didn’t have another thirty hours to put into the drawing. In fact, at the stage I was at in the last sample above, I had fewer than ten hours to finish her entire body AND the foreground. Despite the shift in technique, when viewed from a short distance, the pencil strokes all blend together to give the drawing a photographic look. Overall, it works because the most expressive facial features, where your attention is focused, are all drawn using the same technique for her hair.
Process and patience are the two most important components in realistic drawing—not your tools. When you find the perfect balance, your best friend’s personality will begin oozing off the page long before you’ve finished the drawing … as well as every ounce of heart you put into it.


Beginning the foreground pattern …


My workspace—a tabletop easel, a wide assortment of pencils, kneadable erasers, tape, strips of paper to use as smudge guards, lead sharpeners, and a soft paintbrush to brush away eraser detritus.
TIP: When removing painters’ tape, peel the tape back by pulling it back over itself very close to the paper and away from artwork, not at a 90 degree angle and not toward the artwork. This will help prevent any possibility of tearing the paper and ruining your artwork. It’s worth noting that using any tape will pull pieces of the paper with it when removed—this is unavoidable.
RELATED TIP: If you want to reduce the tack or “stickiness” of painter’s tape before applying it to your canvas, peel off your desired length, press it onto carpeting or a t-shirt, pull off, and then apply it to the paper.
TOOLS & MATERIALS:
This entire drawing was created with Faber Castel and Staedler graphite pencils and Pentel technical pencils (0.5mm and 0.7mm)—ranging from 3H (hardest) to 6B (softest).
Arches 22” x 30” Hot Press Watercolor Paper (bright white)—because it’s burly and takes a lot of abuse.
Kneadable and white vinyl click erasers (never use pink erasers.)
Sealed with Krylon Workable Fixatif.
Note: I did not use stumps or tortillons to blend any gradations—all gradations were done with a very light touch and built up in layers.
Total Time Spent - Approximately, 70 hours
Thank you for all the smiles, Jazzy.